CONTOURING AND HIGHLIGHTING SIMPLIFIED
Some people freak out at the mere word contouring, they think heavy makeup, lines, streaks, orange faces, well let me de bunk all this for you in my new blog post here today. And show you that contouring really does not have to be that complicated. VIDEO AT THE END OF THIS BLOG POST.
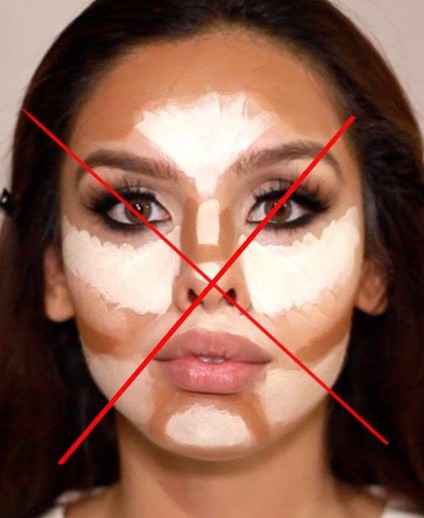
LET ME GET THIS OUT OF THE WAY NOW, HOW NOT TO CONTOUR - ABOVE IMAGES
Below I am going to explain what is contouring and what is highlighting
Contouring and highlighting is a very effective method to make the facial features gain shadows and highlights. Some methods of this application have proven even more popular than cosmetic surgery when done correctly. It can transform a face to make it look more feminine and youthful. Shading an area draws attention away from the area (pushes the area back) Highlighting draws attention to an area.
Areas to contour include: (Please see diagram below for areas to shade and highlight.
Down the neck & under the chin - BE CAREFUL AS THIS CAN AGE PEOPLE
Under the nose and on the tip of the nose
Centre of the cleavage - BE CAREFUL AS THIS CAN AGE PEOPLE
The hollows above and below your collarbone
Hollows of the cheeks, i.e directly on or just under the cheekbone
Creases of the eye, i.e. along the socket
The Temples and around the hairline
AREAS TO CONTOUR THE FACE - BUT REMEMBER NOT EVERYONE WILL NEED EVERY AREA CONTOURING, IT DEPENEDS ON THE PERSONS FACE SHAPE
Areas to Highlight include -
Centre of the eyelid
Cheekbone plane and under the eye, i.e. top of the cheekbone
Around the corners of the mouth
The Collarbone
Inside curve of the breast
Centre of the chin just under the lip
Centre of the forehead
Down the middle of the nose - NOT ON THE TIP LIKE TIN MAN (I DESPAIR SOMETIMES)
AREAS TO HIGHLIGHT ON THE FACE, REMEMBER IT ALSO DEPENDS ON THE PERSONS FACE SHAPE AND SKIN TYPE AS TO WHERE YOU WILL HIGHLIGHT
WARNING - DO NOT APPLY ANY REALLY WHITE GLITTERY OR SPARKLY HIGHLIGHTERS TO THE SKIN, THIS CAN REFLECT OFF THE SKIN BADLY AND ALSO LOOK VERY SILVERY.
Stick to soft cashmere, champagnes, off white tones. Which are very finely milled, these will not have chunks of glitter in and will sit on the skin nicely and look like skin.
WARNING - DO NOT CONTOUR WITH BRONZER, UNLESS YOU HAVE A TAN OR ARE WORKING ON OR HAVE DARKER SKIN. BUT THIS MUST BE A FLAT BRONZER. I ADVISE TO CONTOUR WITH AN ACTUAL CONTOUR SHADE.
If working on lighter skins you need to use a greyish contour shade, just like the Bodyshop shade which is included in the contour palette 01 below (top left image as you look at the picture), I show all my client's this shade as it is a great shade for lighter skin tones. Can you see the difference between that first shade and the more tanned shade next to it, the more tanned tone is what a lot of people contour with, which means you will end up with that ghastly orange face, HUMMMM
I do not tend to contour anyone with really pale skin, I stick to a nice highlight and blusher. Did you know you can actually bring out eh facial features with only highlighter.
BODYSHOP CONTOUR PALETTE SHADE 01 LIGHT PALETTE
Here in the below image, I brought out my models features with the use of only highllighter.
Model Paighton, Model Team Glasgow. Products used are all Kryolan.
WOULD YOU LIKE TO SEE HOW I CREATE THIS DEWY SKIN - YOU CAN WATCH FOR FREE HERE
REMEMBER - CONTOURING IS SUPPOSED TO BE UNDETECTABLE, SO WHY WOULD YOU WANT ORANGE STREAKS ON YOUR FACE, FAIL. Instead opt for the grey tone as listed above, now this will need altering depending on the skin colour you have or are working on. If for instance I have a tan or a client does I will mix the greyish contour shade with a little bit of the tan shade.
You will not want to use the greyish shade on darker skin as it will appear ashy on the skin surface, NOT A GOOD LOOK. Which is why I like to use Bodyshop palette 02 which is catered to darker skin. See below image
BODYSHOP CONTOUR PALETTE SHADE 02 DARKER PALETTE
CONTOUR WITH FLAT SHADES, HIGHLIGHT WITH BEAUTIFUL SHIMMERY TONES (NOT GLITTERY)
To see more of the products I love to use and watch me explain where to contour the face, please do see my video below.
I did not want to delve to far into this make up method for now as it can be a little overwhelming when first learning this. I just wanted to keep it simple for this blog post, more of a basic Introduction to contouring, to help you understand where to shade and where to highlight, and to know what to avoid
I hope this has helped you with your makeup knowledge, I would love to hear your comments below. I will answer any questions you have for me.
To see more of my in depth training modules and courses please CLICK HERE
Thank you for reading, please do enjoy my other blog posts too and I will see you all next time
Sarah


